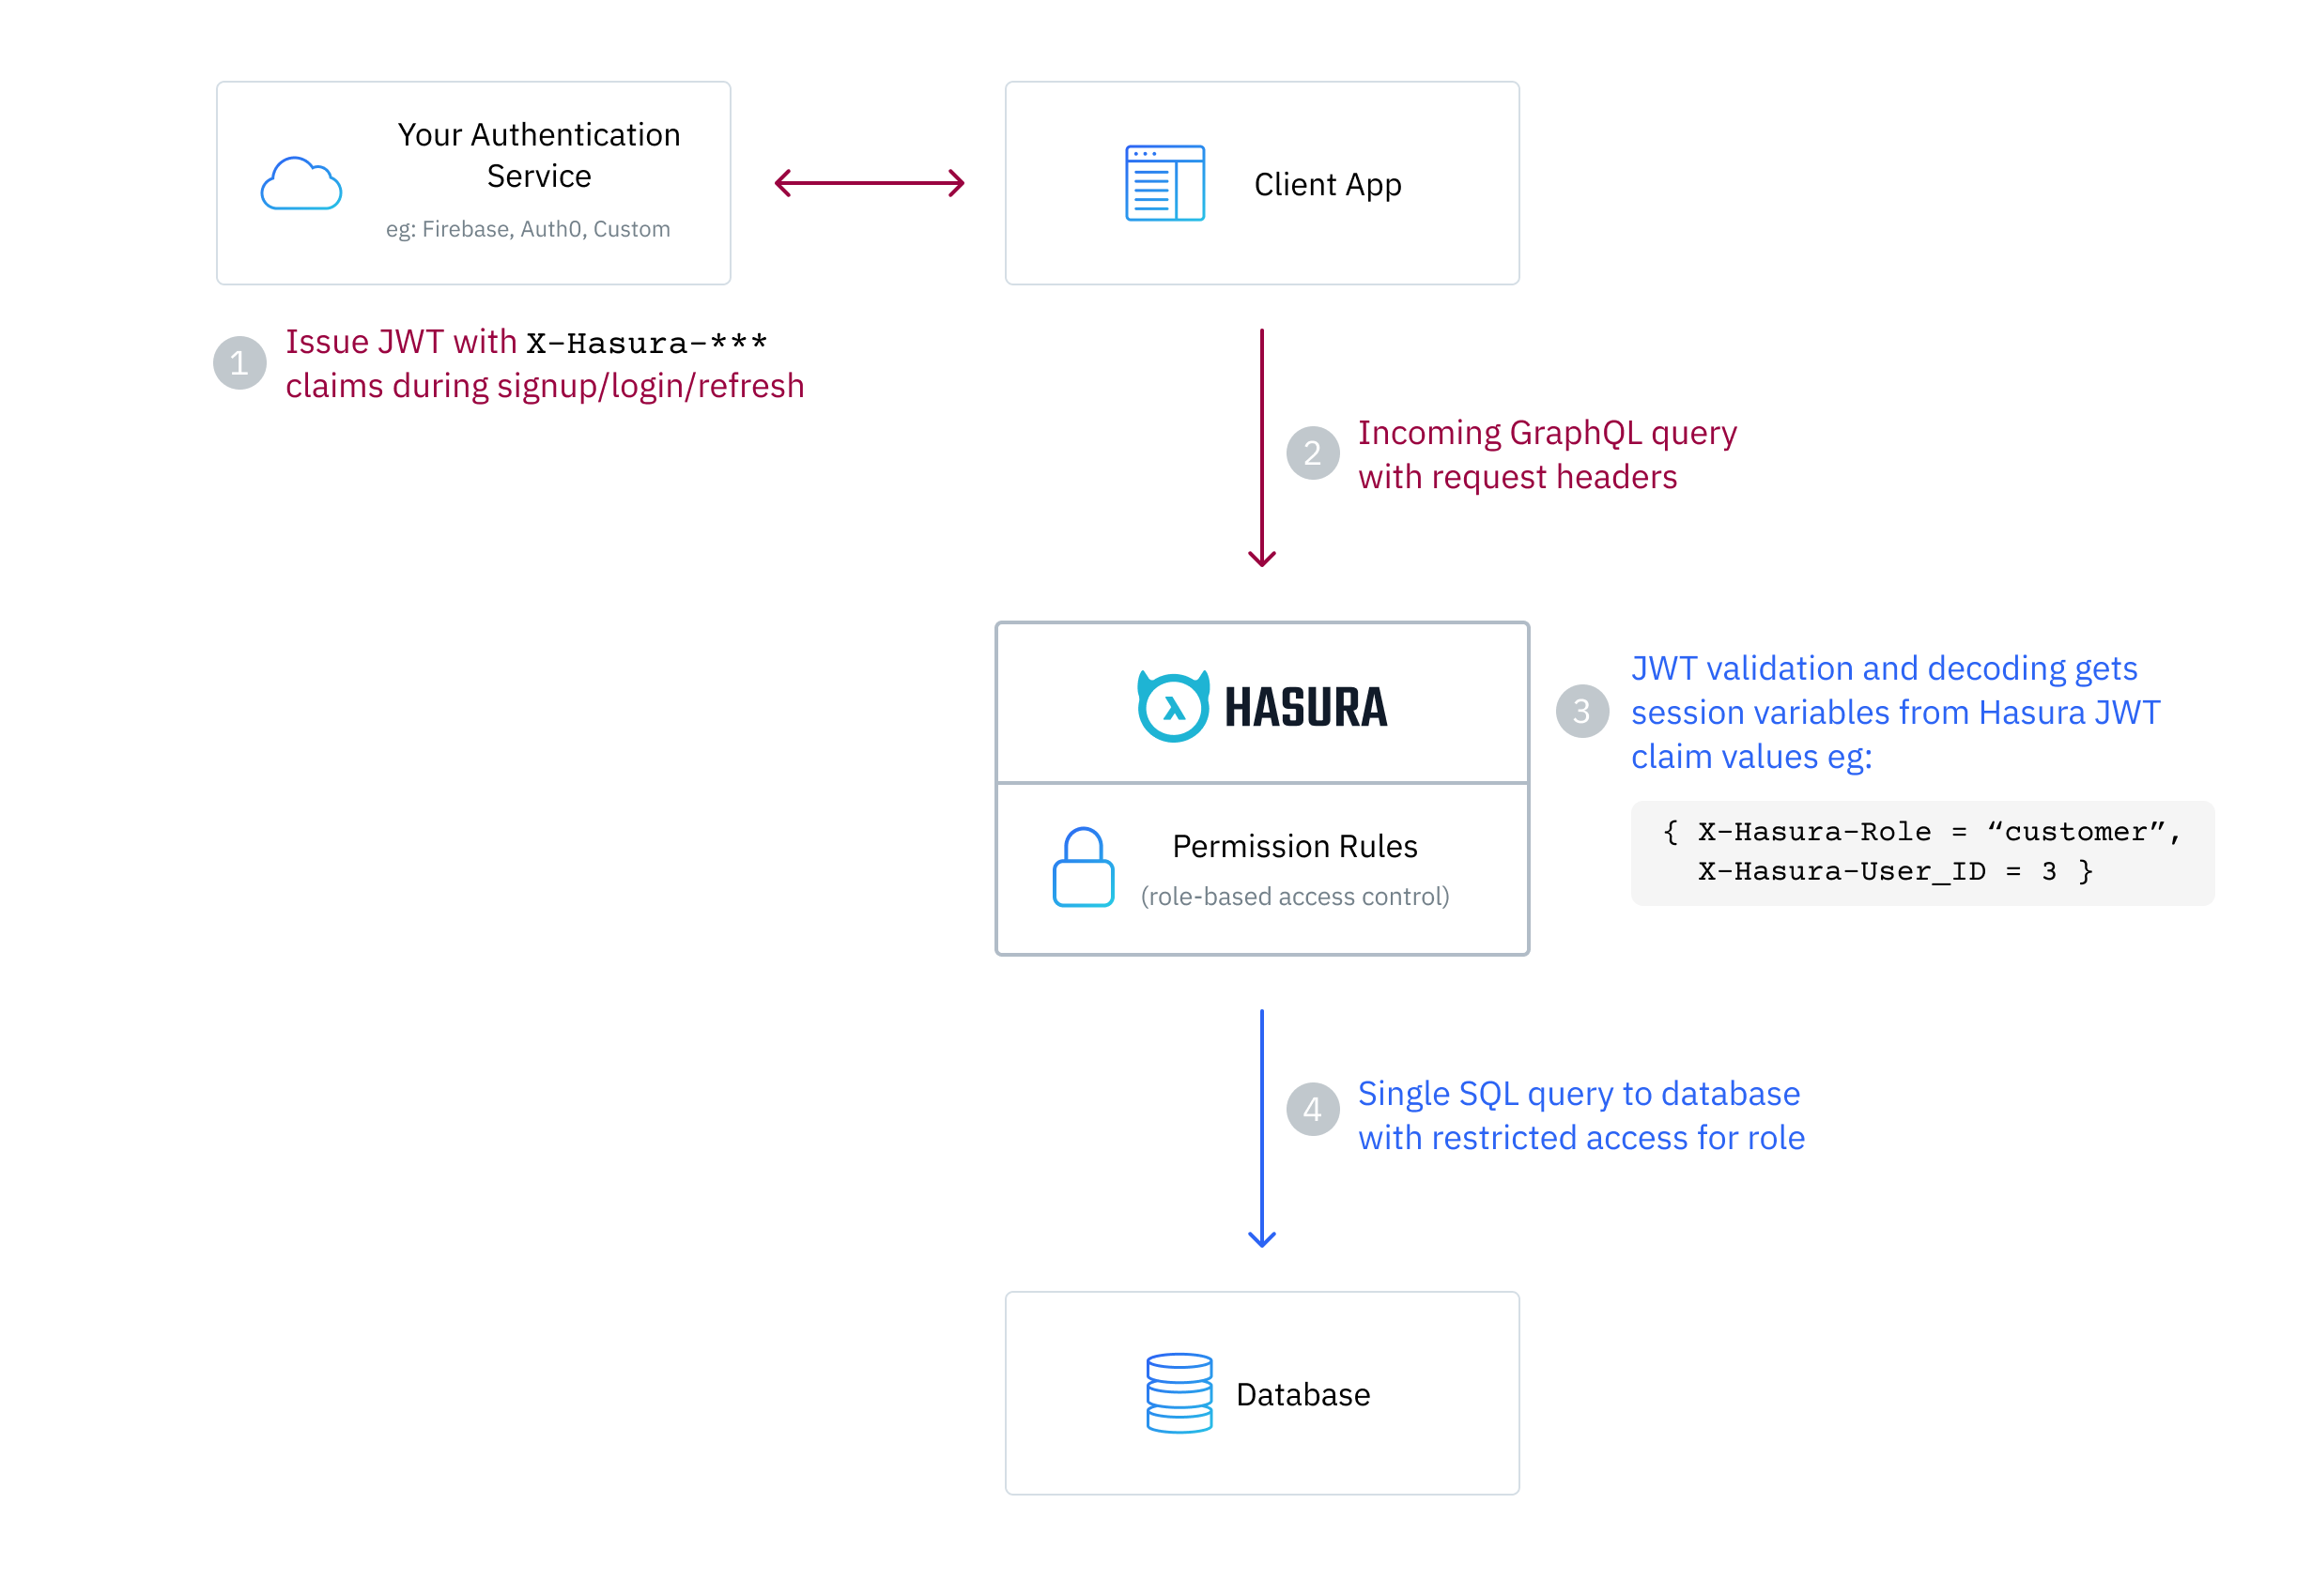
Auth0 with Hasura
When integrating Auth0 with Hasura in a monorepo structure, what seems straightforward at first can quickly become complex. In this article, I'll share my journey of implementing single sign-on (SSO) with Auth0 and Hasura GraphQL API, focusing on creating a flexible and maintainable authentication system.
The Challenge
Hasura's documentation suggests using Auth0's user ID as the primary key in our database's users table. While this approach simplifies permissions at first glance, it creates a tight coupling between our database schema and our authentication provider. Let's explore why this might be problematic and how we can design a more flexible solution.
Standard Approach vs. My Design
The standard approach suggested by Hasura looks like this:
CREATE TABLE users (
  id TEXT PRIMARY KEY,  -- This would be the Auth0 user ID
  name TEXT,
  email TEXT
);
Instead, I've chosen this structure:
CREATE TABLE users (
  id UUID PRIMARY KEY DEFAULT gen_random_uuid(),  -- Our internal identifier
  auth0_id TEXT UNIQUE,  -- Store Auth0 ID as a separate field
  name TEXT,
  email TEXT
);
This design provides several advantages:
- Our database maintains its own identity system
- We can switch authentication providers without restructuring our database
- Our primary keys remain consistent in format and generation method
- Related tables maintain cleaner foreign key relationships
The Permission Challenge
I encounter an interesting challenge with Hasura permissions. Consider a posts table with a foreign key relationship to users:
CREATE TABLE posts (
  id UUID PRIMARY KEY,
  user_id UUID REFERENCES users(id),  -- References our internal user ID
  content TEXT
);
If we were to follow Hasura's standard approach, permissions would look like this:
{
  "user_id": {
    "_eq": "X-Hasura-User-Id"
  }
}
The challenge arises because initially, we might think to use Auth0's user ID in the X-Hasura-User-Id claim. However, this wouldn't match our internal user IDs used in foreign key relationships.
The Solution: Synchronized Authentication Flow
The key insight is that we need to synchronize user creation with claim generation. Instead of having two separate Auth0 actions, we combine them into a single, ordered process:
- First, ensure the user exists in our database
- Then, use our internal user ID in the custom claims
Here's how we implement this in a single Auth0 action:
exports.onExecutePostLogin = async (event, api) => {
  // First: Synchronize user with our database
  const result = await upsertUser();

  // Then: Set claims using our internal ID
  api.accessToken.setCustomClaim('hasura_namespace', {
    'x-hasura-user-id': result.user.id, // Using our internal UUID
    // other headers
  });
};
This approach solves several problems:
- It ensures users exist in our database before setting claims
- It uses our internal IDs for permissions, maintaining consistency
- It works seamlessly for both new and existing users
- It keeps our database schema independent of Auth0
Why This Matters
This design choice provides several long-term benefits:
- Our database schema remains clean and provider-agnostic
- Foreign key relationships use consistent, internal IDs
- We can change authentication providers without restructuring our database
- Permissions work consistently across all related tables
Well, while this approach requires a bit more initial setup than the standard approach, it provides much more flexibility and maintainability in the long run.
Implementing Provider-Agnostic Authentication in a Monorepo
Architecture Overview
In a monorepo, we need to balance sharing code with maintaining flexibility. Here's how I structured the authentication system:
- Core authentication logic lives in
packages/core - Individual apps in
apps/*remain provider-agnostic - Environment variables are handled at the app level (a Turborepo requirement)
The Authentication Provider Implementation
Here's a clean implementation that abstracts away Auth0-specific details:
import { Auth0Provider, useAuth0 } from '@auth0/auth0-react';

const AuthContextProvider = ({ children }) => {
  const auth0Data = useAuth0();

  // Transform Auth0-specific data into our standardized format
  const contextValue = {
    // Our standard auth context value
  };

  return <AuthContext.Provider value={contextValue}>{children}</AuthContext.Provider>;
};

const AuthProvider: FC<Props> = ({ config, children }) => {
  return (
    <Auth0Provider
      domain={config.domain}
      clientId={config.clientId}
      authorizationParams={{
        audience: config.audience, // Critical for custom claims
        redirect_uri: window.location.origin,
      }}
    >
      <AuthContextProvider>{children}</AuthContextProvider>
    </Auth0Provider>
  );
};

export { AuthProvider, useAuthContext };
This design provides several benefits:
- Apps only interact with a generic
AuthProvideranduseAuthContext - Auth0-specific dependencies stay contained in
packages/core - Switching providers only requires changing the core implementation, not application code
Critical Insights: The Auth0-Hasura Connection
The interaction between Auth0 and Hasura requires careful attention to detail. Here's a key insight I discovered: the audience field in Auth0Provider configuration is crucial for custom claims to work properly.

Even if the Auth0 setup includes custom claims in the post-login event, without the correct audience configuration, these claims won't appear in the JWT token. This subtle requirement isn't immediately obvious from the documentation but is essential for proper authorization in Hasura.
Lessons Learned
- Design database schema to be authentication-provider-agnostic
- Use abstraction layers in the monorepo to isolate authentication implementation details
- Pay special attention to JWT token configuration, particularly the
audiencefield
By following these principles, I made a flexible authentication system that's easier to maintain and adapt as the application grows or requirements change.